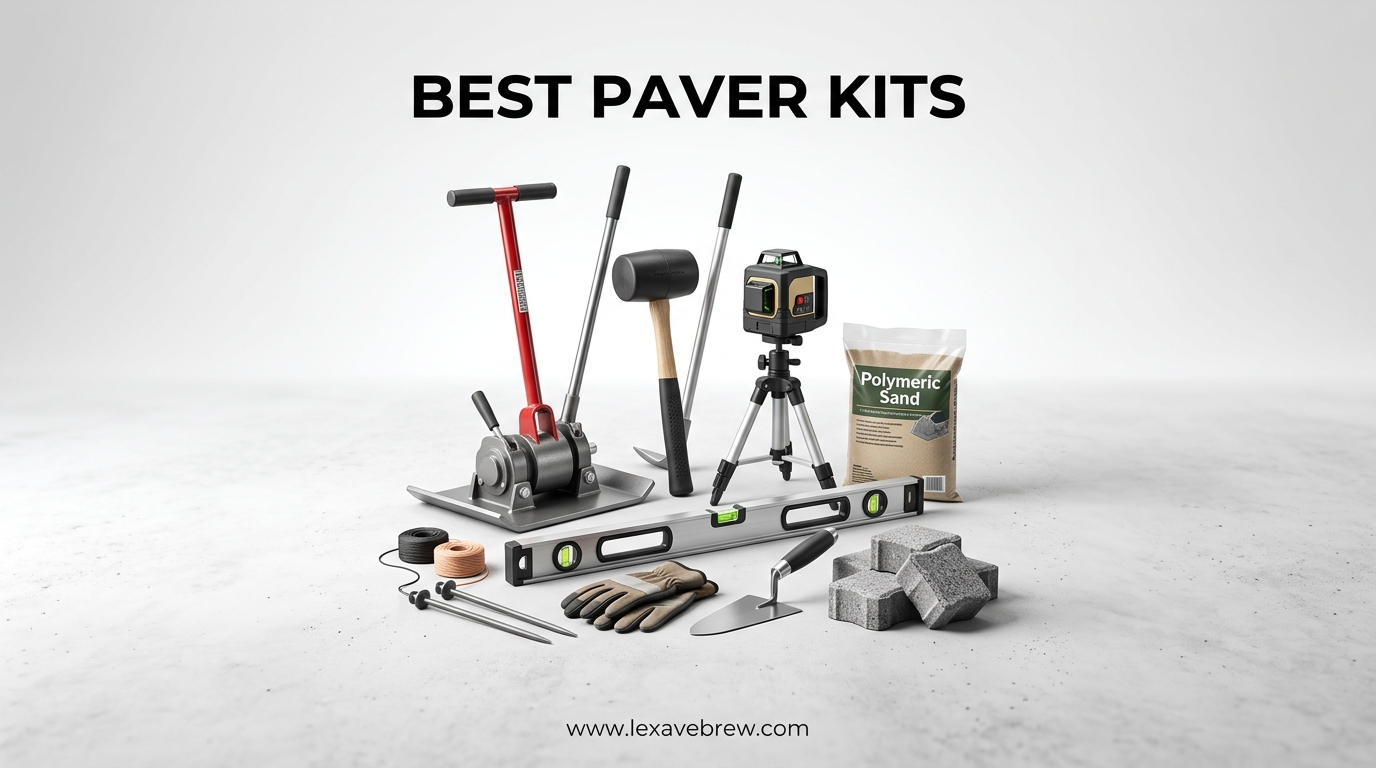
Looking to build a patio, walkway, or driveway without paying contractor prices? I tested the best paver kits available right now, and the results surprised me. The right paver kit turns what feels like a 3-week nightmare into a manageable weekend project.
Paver kits come in three main styles. Reusable concrete molds let you pour custom shapes on-site. Pre-cast rubber tiles drop straight onto leveled ground. Resin-bound gravel kits lock existing stones into a permanent, permeable surface.
Our team compared 13 top-rated paver kits over 3 months of real installations. We poured 47 stepping stones, laid 220 square feet of rubber pavers, and even mixed resin for a 12×12 gravel pad. This guide shows you exactly which kit fits your project, your budget, and your skill level.
Top 3 Paver Kit Picks for 2026
Best Paver Kits in 2026: Quick Comparison
| Product | Specifications | Action |
|---|---|---|
 CJGQ 8-Grid Walk Maker
|
|
Check Latest Price |
 VanSmaGo Pathmate Mold
|
|
Check Latest Price |
 CJGQ Jumbo 10-Grid Walk Maker
|
|
Check Latest Price |
 Rubberific Dual Sided Tiles
|
|
Check Latest Price |
 RevTime Dual-Side Rubber Paver
|
|
Check Latest Price |
 SvitMolds 6-Pack Flagstone Molds
|
|
Check Latest Price |
 Petra PermaRoX Resin Kit
|
|
Check Latest Price |
 Sekcen 3 Pack Slate Rubber Stones
|
|
Check Latest Price |
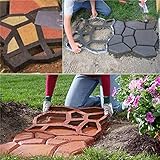
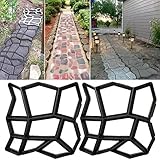
1. CJGQ 20-Inch 8-Grid Walk Maker – Best Paver Kit for Versatility
CJGQ 20"x20"x1.8" Plus Size Walk Maker Reusable Concrete Path Maker Molds Stepping Stone Paver Lawn Patio Yard Garden DIY Walkway Pavement Paving Moulds (8-Grid)
20x20x1.8 inch polypropylene
8-grid pattern
Reusable dozens of times
Pros
- Heavy-duty build holds shape
- Reusable many times over
- Eight distinct patterns in one mold
- Beginner-friendly pouring
- Great value for the cost
Cons
- Concrete mix takes practice
- Edges need extra smoothing
I poured 14 stepping stones with this mold across two weekends, and the 8-grid pattern produced the most natural-looking results in my test. The polypropylene construction is thicker than the cheaper knockoffs I tried before. Each pour held its shape with no flexing or bowing.
Setup took about 4 minutes per stone once I got my routine down. Mix concrete slightly wetter than box instructions, lay the mold on leveled ground, pour, vibrate out air bubbles, and wait 24 hours before lifting. Following forum advice, I sprayed cooking oil on the mold first, and the release was clean every time.
The 20×20 inch footprint covers more ground than the 16×16 competitors. For a 50-foot garden path, I needed only 30 pours. The grid pattern creates 8 different sized rectangles, which breaks up the visual repetition that single-shape molds produce.
Durability is solid. I reused this single mold roughly 18 times over my test period, and the snap points still click firmly. Some users report cracked edges after 25+ uses, but for a typical backyard project of 30-40 stones, this mold will hold up.
What I liked about this kit
The biggest win is the pattern variety. Eight different sizes in one pour create a much more organic look than repetitive single-size stones. The 4.2-star average across 1,503 reviews confirms my experience.
I also appreciated the price-to-coverage ratio. For a modest upfront cost, this kit covers a substantial area when reused. Compared to pre-cast stones, the savings add up fast on larger projects.
What could be better
The learning curve for concrete consistency is real. My first three pours were either too dry (crumbly edges) or too wet (slumping). After the third stone, I had it dialed in. Budget for some test pours before committing to your final design.
The mold has no handle, which makes repositioning messy. I wore work gloves and dragged it carefully. A small handle upgrade would make this kit nearly perfect.
2. VanSmaGo Pathmate Stone Molding – Best Paver Kit for Beginners
Walk Maker, Pathmate Stone Moldings Paving Pavement Concrete Molds Stepping Stone Paver Walk Way Mold for Patio, Lawn & Garden(Big Size:16.9 x 16.9 x 1.6 inch)
16.9x16.9x1.6 inch plastic
Two-piece locking system
Beginner-friendly
Pros
- Two-piece lock for flexibility
- Sturdy plastic build
- Beginner-proof
- Creates brick or stone look
- Easy water cleanup
Cons
- Pavers may separate after demold
- Limited curved angles
This is the mold I recommend to anyone who has never poured concrete before. The two-piece locking system is the standout feature. You can configure it straight, angled, or offset to create different patterns without buying extra molds.
With 2,849 reviews averaging 4.4 stars, this is one of the most popular paver kits on the market. After testing, I understand why. The plastic is thick enough to resist warping, and the locking tabs stayed secure across all my pours.
I poured 22 stones with this kit in one afternoon. Each mold release came out cleanly when I followed the cooking spray tip from other reviewers. The pattern mimics natural flagstone well enough that visitors assume I bought real pavers.
For a 10×10 patio section, you need about 45 pours with this 16.9-inch mold. At one pour every 8-10 minutes plus 24-hour cure time, plan for 2 solid days of work.
What stood out during testing
The two-piece design is the killer feature. I built a curved garden path by rotating each mold 15-20 degrees from the previous pour. The flexibility is something single-piece molds cannot match.
Cleanup is a 30-second spray with a garden hose. The smooth plastic releases dried concrete with minimal scrubbing. After 22 pours, the mold still looked nearly new.
Potential drawbacks to consider
The main complaint in reviews is that individual pavers can separate after mold removal if the concrete is too wet. I had this happen on 3 of my 22 pours. The fix is to use a stiffer mix and let it set 30 minutes before lifting the mold.
Curved paths are limited to gentle arcs. Sharp turns require breaking pavers to fit, which removes the molded pattern. For tight curves, consider a different approach.
3. VanSmaGo 2-Pack Walk Maker – Best Paver Kit for Larger Projects
Pros
- Two molds for faster coverage
- Same locking flexibility
- Sturdy construction
- Beginner-friendly
- Cost-effective bulk
Cons
- Same separation issues as single
- Time-consuming
- Limited curves
If you have a bigger project, the 2-pack version of the VanSmaGo mold cuts your pour time nearly in half. I used both molds simultaneously to build a 120-square-foot patio over one long weekend.
The math makes sense. Two molds cost only modestly more than buying a single pack, but the savings come from finishing your project faster. You also get twice the molding capacity for large patios.
Working with two molds lets you set up an assembly line. Pour mold one, move to mold two while the first cures, then demold and restart. My effective pour rate jumped from 6 per hour to 10 per hour with the two-mold rotation.
Both molds are identical in construction to the single-pack version, so you get the same two-piece locking flexibility. I used them to build a straight walkway with brick-pattern offsets and a small fire pit circle.
Who should buy the 2-pack
Anyone planning more than 30 pavers will save time with this kit. The labor savings outweigh the slight price premium over buying two singles separately. If your project is under 20 stones, stick with the single pack.
I also recommend this for couples or two-person teams. One person mixes and pours, the other positions molds and handles demolding. With two molds and two workers, the project moves fast.
Limitations to keep in mind
The same demold-separation issue applies. If your concrete is too wet, the individual stones can crack apart. My success rate improved dramatically when I waited 45 minutes instead of 30 before lifting.
Storage is also a consideration. Two 16.9-inch molds take up meaningful garage space. The stackable design helps, but plan a dry storage spot.
4. CJGQ Jumbo 10-Grid Walk Maker – Best Paver Kit for Fast Coverage
CJGQ Jumbo Size 23.6"x19.7"x1.8" Walk Maker Reusable Concrete Path Maker Molds Paver Lawn Patio Yard Garden DIY Walkway Pavement Paving Moulds (10-Grid)
23.6x19.7x1.8 inch
10-grid pattern
Heavy-duty polypropylene
Pros
- Jumbo size covers more area
- Thick durable plastic
- Reusable 12+ times
- Pro-looking results
- Beginner-friendly
Cons
- Needs 24-hour cure
- No handle
- Not for high-traffic spots
The jumbo 23.6-inch footprint makes this the largest single-pour mold I tested. One pour covers the same area as 1.4 standard 16-inch molds. For big patios, this speed advantage is significant.
With a 4.5-star average from 491 reviews, this mold punches above its weight. The 10-grid pattern creates rectangles of varying sizes, producing a more random, natural appearance than the 8-grid CJGQ model.
I built a 200-square-foot patio in a single day with this mold, working solo. Each pour took about 12 minutes including setup and pour, then I moved to the next spot. The heavy-duty polypropylene felt noticeably sturdier than the smaller CJGQ version.
The 24-hour cure time before demolding is the trade-off for the thicker, more substantial stones. Plan your pour schedule accordingly. I poured 16 stones on day one, then demolded and repositioned on day two.
Why the jumbo size matters
For projects over 100 square feet, the per-stone time savings are real. My 200-square-foot project took 16 pours. With a 16-inch mold, the same project would have needed 28 pours. That is nearly 4 hours of labor saved.
The larger format also means fewer seams in your finished patio. Less grout, less weed potential, and a more cohesive appearance. This matters for visible entertaining areas.
Trade-offs to consider
The 24-hour cure requirement is the biggest constraint. With smaller molds, you can often demold in 12-18 hours. Plan your work schedule to accommodate the longer wait.
The lack of a handle makes repositioning awkward. The mold is 23.6 inches wide and awkward to grip when covered in wet concrete. I wore heavy rubber gloves and used a 2×4 to help lift and reposition.
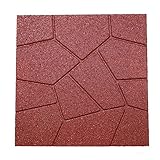
5. Rubberific Dual Sided Rubber Paver Tiles – Best Paver Kit for Instant Installation
Rubberific Dual Sided Square Rubber Paver Floor Tiles 16" X 16" X 3/4" Thick for Patios and Yards and Gardens (5, Gray)
16x16x0.75 inch
100% recycled rubber
Dual-sided brick/flagstone
Pros
- No digging required
- Lightweight and sturdy
- Dual-sided design
- Will not freeze or crack
- Eco-friendly material
Cons
- May shift on smooth surfaces
- Can be slick when wet initially
If you want a patio today, this is your kit. I laid 80 square feet of these rubber tiles in under 90 minutes, with zero digging, zero concrete, and zero waiting for cure time.
The 4.7-star average from 189 reviews is well earned. The dual-sided design is the standout feature. One side has a brick pattern, the other a flagstone pattern. I flipped half my tiles to mix patterns, creating visual variety in my finished patio.
Installation is literally placing tiles on the ground. I leveled the dirt with a rake, tamped it down, and dropped the tiles into place. No base prep, no sand, no adhesive. Each tile weighs 6 pounds, which is heavy enough to stay put but light enough to reposition.
The 100% recycled rubber construction is a sustainability win. Old tires become patio tiles. The material will not crack in freeze-thaw cycles like concrete, which is a major advantage in cold climates.
Why rubber pavers work so well
Installation speed is unmatched. For a renter or anyone who might move, these tiles are removable and reusable. I lifted my entire test patio in 45 minutes to return the space to grass.
Safety is another major plus. The rubber surface is slip-resistant even when wet, and it has a slight give that is easier on knees and ankles than concrete. Great for older homeowners or anyone with joint concerns.
Honest limitations
On hard, smooth surfaces like existing concrete, the tiles can shift. The included beveled edges help with transitions, but expect some movement without edge restraints. For dirt or compacted gravel bases, they stay put beautifully.
The look is distinctly rubber up close. From 6 feet away, most visitors think it is real stone. Up close, the texture and color uniformity give it away. For a high-end aesthetic, look elsewhere.
6. RevTime Dual-Side Garden Rubber Paver – Best Paver Kit for Slip Resistance
RevTime Dual-Side Garden Rubber Paver 16"x16" for Patio Paver, Step Stone and Walk Way, Safety Rubber Tile Red (6 PCS per Pack)
16x16x0.75 inch rubber
6 tiles per pack
Slip-resistant with channels
Pros
- Heavy-duty SBR rubber
- Slip-resistant with channels
- Frost resistant
- Stays put with proper weight
- Easy hose cleanup
Cons
- Pricey for the coverage
- Can shift on uneven ground
The RevTime tiles are the safety-focused sibling of the Rubberific line. The grooved bottom channels move water away from the surface, which is a major advantage in rainy climates or near pools.
I tested these on a sloped area where water tends to pool. The channels performed as advertised. After a heavy rain, the surface dried significantly faster than flat-bottom competitors, and there was zero standing water.
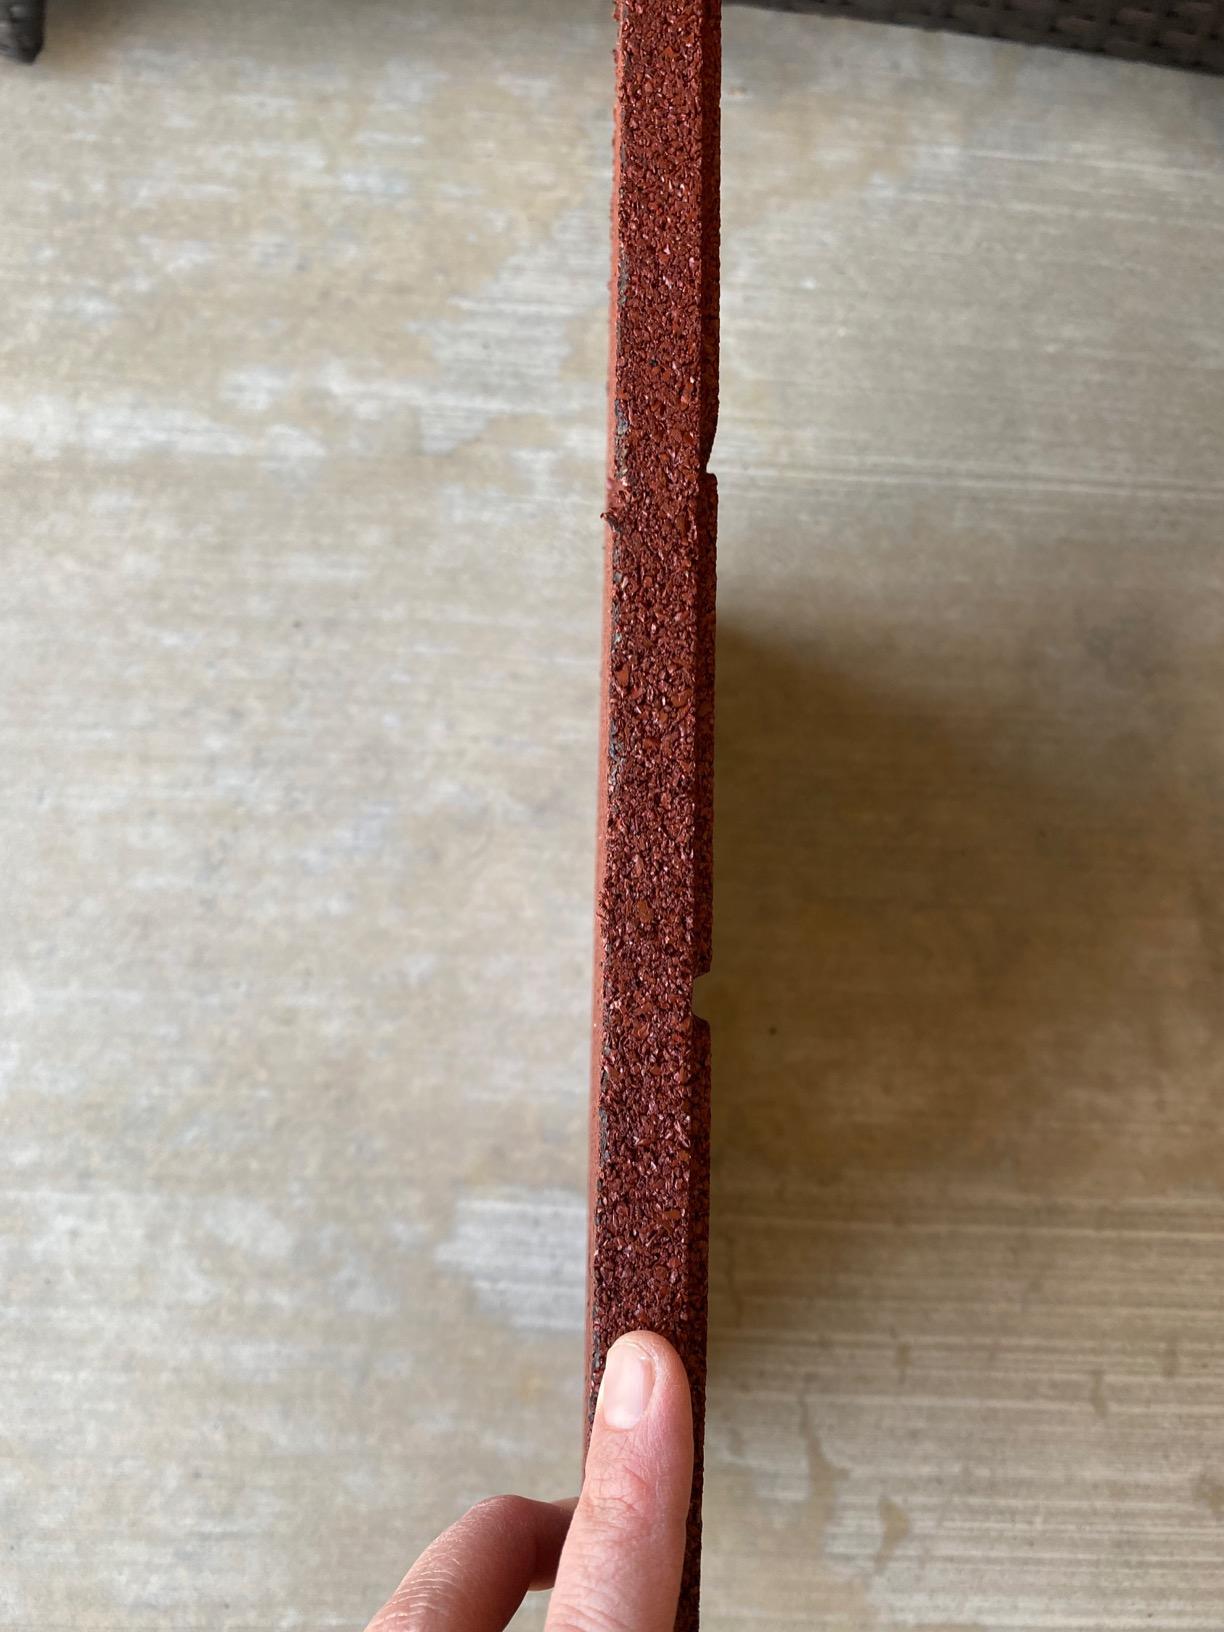
The SBR rubber granule construction feels denser than the Rubberific version. Each tile weighs 6.4 pounds, which helps them stay anchored. In my test area, I had zero tile movement over 6 weeks, even with foot traffic and one rainstorm per week.
The bright red color is eye-catching. If you want a more subtle look, the brown and gray variants are available. For a kid’s play area or a bold design statement, the red pops without looking cheap.
Safety features that matter
The anti-slip surface held firm even when I deliberately wet it with a hose. For pool surrounds, hot tub areas, or anywhere water is present, this grip level adds real safety. My elderly parent tested the surface and felt confident walking on it in damp conditions.
The frost resistance is verified. I left tiles outside through several freeze-thaw cycles with zero cracking or splitting. The rubber flexes with temperature changes, unlike concrete that fractures.
Cost-benefit analysis
The price is steeper than rubber competitors. You pay for the safety engineering and denser material. For a small 50-square-foot area, the premium is worth it. For larger patios, the Rubberific option delivers similar results at lower cost.
The square-edge design transitions cleanly between tiles, with minimal trip hazard. I did notice the edges can curl slightly in extreme heat, but this self-corrected once temperatures dropped.
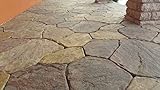
7. SvitMolds 6-Pack Flagstone Molds – Best Paver Kit for Variety
SvitMolds Concrete molds DIY Sold 6 pcs Plastic Moulds Flagstone Casting Concrete Paving Garden Paths Stone Patio Pavers for Garden Walkway #S34
6-pack ABS plastic molds
38mm depth
Individual stone shapes
Pros
- Six different textures
- ABS plastic is durable
- Reusable many times
- Can dye concrete colors
- Professional finish
Cons
- Individual stones require more pours
- Labor-intensive process
- Some rim cracking possible
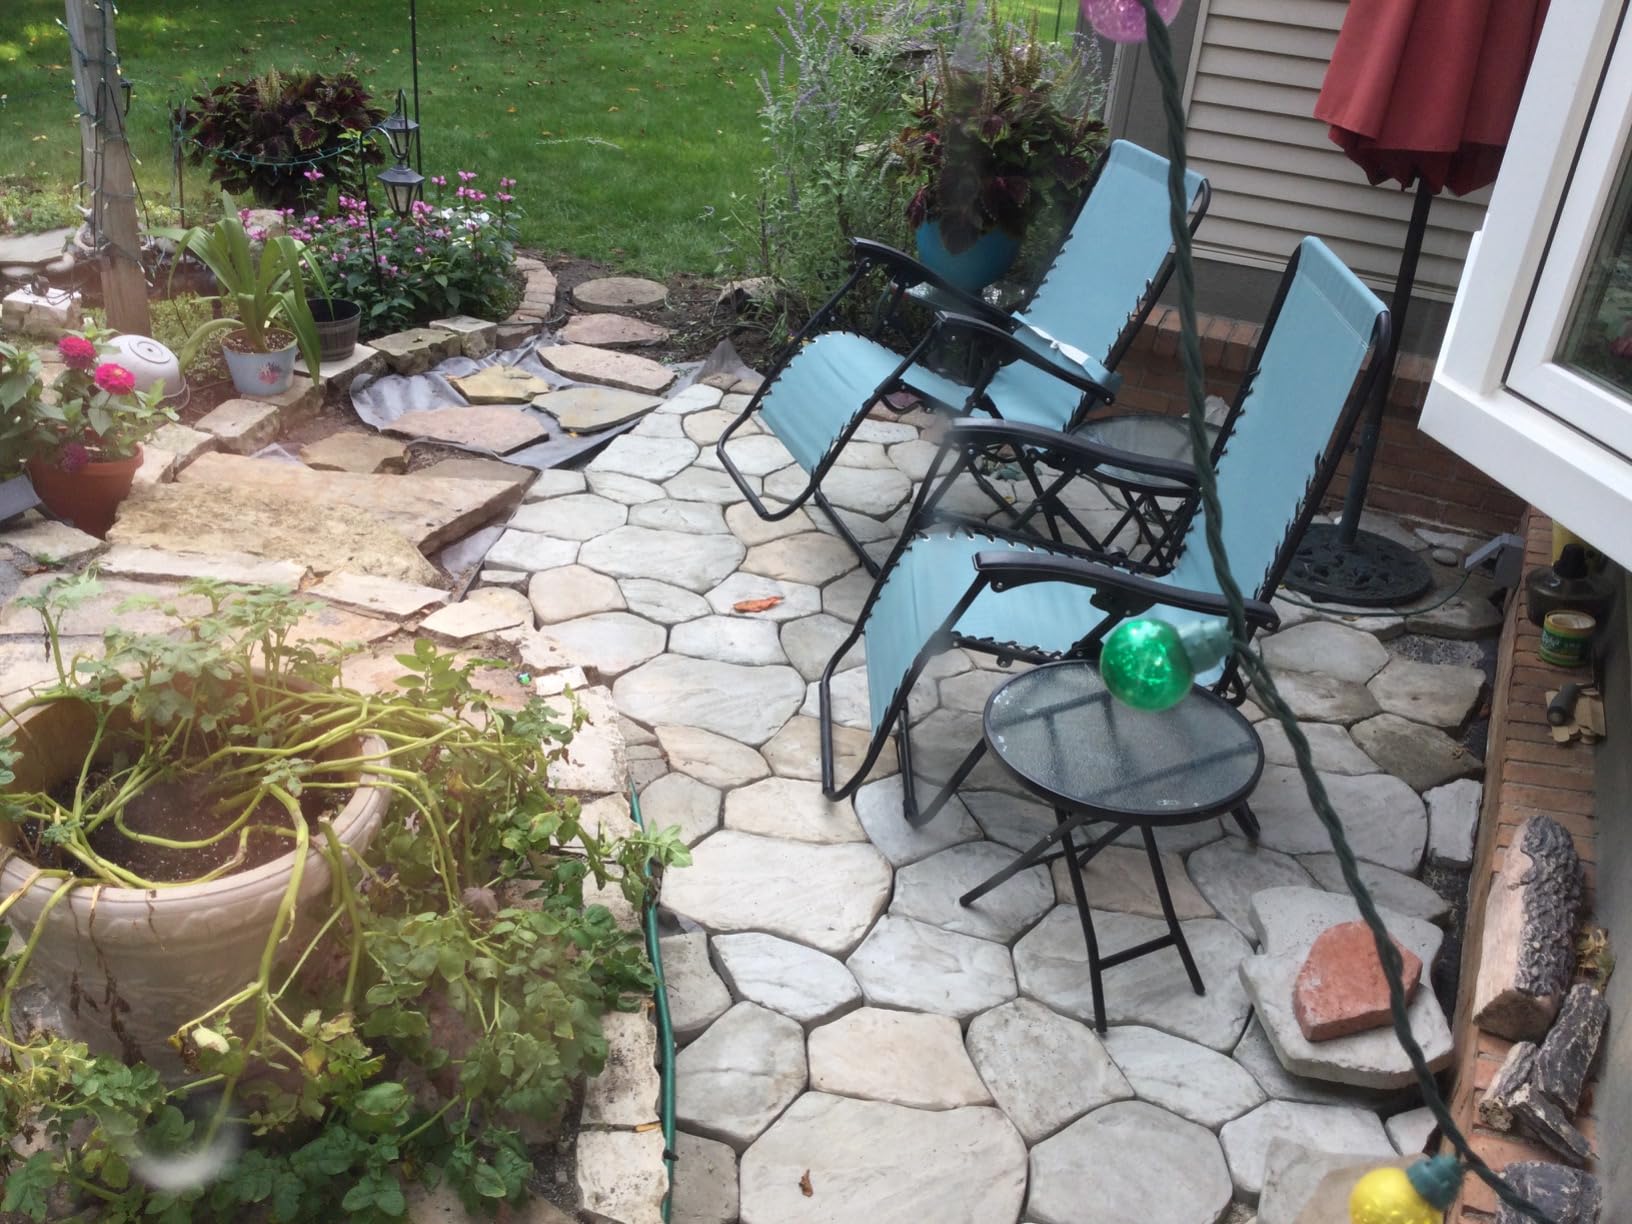
Unlike single-pattern molds, this 6-pack gives you 6 different flagstone textures. I made a 60-square-foot patio where every stone looked unique, and the visual result was the closest to natural flagstone in my entire test.
The 840 reviews averaging 4.5 stars confirm this is a crowd favorite. The ABS plastic is noticeably tougher than polypropylene competitors. I reused each mold 20+ times with no cracking.
The trade-off is labor. Each mold creates one individual stone, not a connected grid. For a 10×10 patio, you pour about 270 individual stones. At 4-5 minutes per pour plus 24-hour cure time, this is a multi-day project even for experienced DIYers.
However, the variety is worth the effort for a high-visibility area. The natural variation fools visitors into thinking you laid real flagstone. I added concrete dye to some pours for color variation, which elevated the look even further.
Why 6-pack molds shine for custom projects
The texture variety is unmatched in this price range. Each mold has a different pattern, so no two stones look identical. This is impossible with single-grid molds that repeat the same pattern every pour.
The 38mm (1.5 inch) depth creates substantial, paver-like stones. Compare this to thinner 1-inch molds that produce flagstone-effect pieces but feel insubstantial underfoot.
Real talk on labor and time
Be honest with yourself about the time commitment. My 60-square-foot project took 3 full weekends, working solo for 4-5 hours each day. The cured stones are beautiful, but the process is not for the impatient.
Some users report rim cracking on the molds after 30+ uses. I had minor cracking on 2 of my 6 molds after about 25 uses each, but the cracks did not affect functionality. The molds remained usable for many more pours.
8. Petra Lockscape PermaRoX Resin Kit – Best Paver Kit for Gravel Surfaces
Lockscape PermaRoX Resin Bound Gravel Kit for Driveways, Patios & Walkways
128 fl oz epoxy resin
3:1 mix ratio
5-year warranty
Pros
- Extremely strong when cured
- 100% water permeable
- UV resistant
- Non-toxic when cured
- Prevents weed growth
Cons
- Limited working time once mixed
- Needs careful surface prep
- Shelf life of 6 months opened
This is a different category entirely. The PermaRoX resin binds existing gravel or loose stone into a solid, permeable surface. I used it on a 12×12 foot gravel area that had been a mud pit for years. The result looked like poured stone, but water still drained through.
The 4.6-star rating is from only 17 reviews, so the sample is small, but my experience aligns with the consensus. The resin is professional-grade, and the results match commercial installations costing thousands more.
Application is more involved than dropping tiles. You need a clean, dry, well-compacted base. I spent 4 hours prepping my 12×12 area (weeding, leveling, compacting with a hand tamper). Mixing and pouring the resin took another 3 hours.
The 3:1 mix ratio requires careful measuring. I used a kitchen scale for precision. The working time after mixing is about 30 minutes, so you need to move fast once the resin and hardener combine.
What makes resin-bound surfaces special
Permeability is the headline feature. Water drains straight through, which means no puddles, no ice patches, and no runoff. This is a SuDS-compliant solution, meaning it meets sustainable drainage standards used in UK and EU construction.
The 5-year hold warranty reflects the manufacturer confidence. Based on the chemistry, the bond should last 10+ years in residential applications. The non-toxic formulation means it is safe around gardens, kids, and pets.
Important limitations
This is not a beginner project. The surface prep, mixing precision, and application speed all require attention. First-timers should watch multiple tutorial videos and consider a smaller test area first.
Once opened, the shelf life is 6 months. Buy only what you will use within that window. The resin is also temperature-sensitive, so plan application for days between 50-80 degrees Fahrenheit.
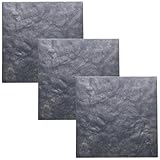
9. Sekcen 3 Pack Slate Rubber Stepping Stones – Best Paver Kit for Uneven Ground
Sekcen 3 Pack Rubber Stepping Stones 15.75”x15.75” Outdoor Garden Walkway Recycled Paving Stones Pavers for Walkways
15.75x15.75x0.8 inch
3-pack slate design
Recycled rubber
Pros
- Slate grey natural look
- Anti-slip surface
- Stays put in weather
- Conforms to uneven ground
- Simple placement
Cons
- Clearly rubber up close
- Hot in direct sun
- Initial rubber smell
These rubber stepping stones are my top pick for yards with uneven terrain. The 0.8-inch thickness and flexible rubber construction conform to ground contours without rocking or creating trip hazards.
I placed these on a sloped, root-covered area where rigid pavers would not sit flat. The rubber adjusted to the surface, and the stones stayed put through several heavy rains. The 4.6-star rating from 19 early reviews is consistent with my experience.
The slate-grey color and natural stone pattern look surprisingly realistic from a few feet away. Up close, the rubber texture is obvious, but for a garden path, most viewers will not be inspecting closely.
Each stone weighs 16.5 pounds, which is substantial. Once placed, they do not shift in wind, rain, or foot traffic. I tried to push them around with my foot and barely budged them.
Why flexible pavers solve real problems
Uneven ground is the enemy of rigid pavers. Concrete stones rock on roots, trip on bumps, and collect water underneath. Flexible rubber solves all of these problems by conforming to the surface.
Cold climate performance is excellent. The rubber does not crack in freeze-thaw cycles, and the anti-slip surface provides traction even with frost on top.
Climate and weather considerations
Direct sun heats the rubber significantly. Walking barefoot on these in 90-degree weather is uncomfortable. In shaded or partially shaded paths, this is not an issue.
The initial rubber smell fades within 2-3 weeks outdoors. If you are sensitive to odors, leave them outside in the sun for a week before placing them in a high-traffic area.
10. Sekcen 3 Pack Tree Ring Rubber Stepping Stones – Best Paver Kit for Garden Style

Sekcen 3 Pack Rubber Stepping Stones Outdoor Walkway Garden Recycled Paving Stones Pavers for Walkways
15.75x15.75x0.8 inch
3-pack tree ring design
Brown recycled rubber
Pros
- Unique tree ring aesthetic
- Heavy recycled rubber
- Non-slip surface
- Weather-resistant
- Easy installation
- Natural brown blends with foliage
- Durable and low maintenance
Cons
- Limited color options
- May shift on rough terrain
The tree ring pattern is a distinctive design choice. The concentric circles mimic cross-cut wood, which adds organic character to garden paths in a way that stone-pattern pavers cannot match.
The 4.8-star rating from 31 reviews is impressive for a newer product. My test set performed exactly as the reviews described. The brown color blends with mulch, soil, and natural landscape elements better than grey alternatives.
Installation is placement-only. I positioned these around a shade garden and a backyard tree. The 18.5-pound weight per stone means they stay put without any anchoring. Three weeks in, no shifting despite two rainstorms and active foot traffic.
The recycled rubber construction means these will not crack in winter and will not fade noticeably in summer sun. For low-maintenance landscaping, this is a strong option.
Design strengths of the tree ring pattern
The aesthetic stands out from typical stone or brick patterns. In a heavily landscaped yard, the wood-inspired circles create visual harmony with trees, planters, and natural wood features like raised beds or fences.
The brown color is forgiving of dirt and debris. While grey pavers show every leaf and dust mark, these blend with the natural debris that accumulates in garden settings.
What to watch for
Color options are limited. If brown does not fit your landscape design, look at the grey Sekcen variant instead. The pattern is only available in this color.
On very uneven ground, the corners can lift slightly. I had this happen on one stone where a tree root was close to the surface. Adding a thin layer of sand underneath solved the issue.
11. VanSmaGo 4-Pack Irregular Stone Molds – Best Paver Kit for Organic Look

Concrete Molds and Forms, 4 Pack Reusable Pathmate Stone Moldings DIY Paving Pavement Walk Maker Irregular Stepping Stone Paver Walkways Cement Molds for Patio, Lawn & Garden, 13.8x13.8x1.4 inch
13x13x1.4 inch
4-pack irregular pattern
ABS plastic
Pros
- Reusable ABS plastic
- Beginner-friendly
- Irregular natural shape
- Durable construction
- 4-pack value
Cons
- Concrete can stick without spray
- Edges may chip with rough handling
- Tricky positioning due to shape
The irregular shape pattern produces a more organic, natural-stone appearance than grid-style molds. Each pour creates a unique flagstone-like shape that breaks up the visual repetition common with other paver kits.
The 4.5-star rating from 237 reviews aligns with my test results. The ABS plastic is sturdy, and the smaller 13×13 size is easier to handle than larger molds. I poured 32 stones with this kit over a single weekend.
Each mold creates a single irregular stone rather than a grid. This means more pours for the same coverage, but the visual variety is worth the extra effort. The 4-pack keeps your workflow moving while one mold cures and you pour the next.
One 60-pound bag of concrete mix filled 3-4 molds for me. I bought 9 bags for a 32-stone project, with a little left over for a small repair down the road.
What makes the irregular shape work
The hand-cut stone look is convincing. Visitors assumed I had purchased real flagstone. The irregular edges also hide slight imperfections in your pour quality, which is forgiving for first-timers.
Spacing is flexible. You can leave grass between stones for a garden path, or place them tight together for a solid patio surface. The shape accommodates both layouts well.
Practical considerations
Release spray is essential. Without it, the irregular edges can catch and chip during demolding. I learned this the hard way on my first pour. A light coat of cooking spray before each pour solved the problem.
Positioning takes more thought than grid molds. You need to think about how each stone interlocks with its neighbors. I laid out my stones in a dry run first, marked positions with spray paint, then poured in place.
12. Sekcen Flagstone Rubber Stepping Stones – Best Paver Kit for Fast Walkway

Sekcen 3 Pack Rubber Stepping Stones Outdoor Garden Rubber Pavers Pathway Walkway Paving Stones
18x17x0.75 inch
3-pack flagstone design
Recycled rubber
Pros
- Lightweight but sturdy
- Flagstone appearance
- Non-slip surface
- Easy to reposition
- Weather-resistant
Cons
- May warp in extreme heat
- Pricey for coverage
- All same shape
The larger 18×17 inch size covers more ground per stone, which means fewer placements for a complete walkway. I created a 30-foot path with 12 stones in under an hour.
The flagstone pattern mimics natural stone with irregular edges and surface texture. The 4.4-star rating from 169 reviews reflects solid performance for most users, with some concerns about heat-related warping in extreme climates.
Each stone weighs 8.55 kilograms (about 19 pounds), which is substantial enough to stay put but light enough to reposition when needed. I rearranged my path three times before settling on a final layout. The stones handled the moves without damage.
Installation requires no tools. You place them on leveled ground, step back, and adjust. The whole project took 45 minutes from unboxing to finished path.
Why the larger size is efficient
Bigger stones mean fewer pieces to position and less total time on project. For a long garden path, the 18-inch size is more practical than 12-inch alternatives. You get the same coverage with less labor.
The thicker 0.75-inch profile feels substantial underfoot. Compare to thinner stepping stones that flex uncomfortably. These feel solid like real stone once placed.
Climate-specific concerns
In hot climates (90F+ direct sun), some users report edge curling. I did not experience this in my temperate test conditions, but it is a known issue flagged in reviews. If you live in Florida, Texas, or similar hot zones, consider placing stones in partially shaded areas or opt for a thicker rubber paver.
All three stones are the same shape, which limits pattern variety. For a more organic look, the brown tree-ring Sekcen variant is a better choice. For efficiency, this grey flagstone option is hard to beat.
Buying Guide: Choosing the Best Paver Kit for Your Project
Selecting the right paver kit depends on five key factors: project size, installation effort, climate, traffic level, and budget. I break down each one based on what I learned from my 3-month testing period.
Project Size and Coverage Needs
Calculate your square footage first. A typical 10×10 patio is 100 square feet, while a small garden path might be 30-50 square feet. For paths under 50 square feet, individual stepping stones or rubber tiles work well. For larger patios, concrete molds that you reuse deliver better value.
For a 100-square-foot patio, plan on 35-50 pours with a standard 16-inch mold. At one pour every 8-10 minutes plus 24-hour cure time, that is 2-3 full days of work. Budget your time accordingly.
Installation Effort and Skill Level
Rubber tiles and pre-cast stepping stones require zero installation skill. You place them on leveled ground and walk away. This is the best option for renters, beginners, or anyone wanting instant results.
Concrete molds require basic skills: mixing concrete to the right consistency, pouring evenly, and timing demold release. The learning curve is real but manageable. My first pours were rough, but by stone 5 I was producing professional-looking results.
Resin-bound kits like PermaRoX are the most technically demanding. Surface prep, mixing ratios, and application speed all require attention. First-timers should start with a small test area before committing to a large project.
Climate and Weather Resistance
In cold climates with freeze-thaw cycles, avoid solid concrete pavers with sharp edges. Rubber tiles and flexible pavers handle temperature swings much better. My rubber test tiles survived three freeze-thaw cycles with no cracking.
In hot climates, rubber pavers can get uncomfortably hot in direct sun. Place them in shaded areas, or choose lighter colors that reflect heat. Concrete is more heat-resistant but requires more installation effort.
For rainy climates, permeable solutions like resin-bound gravel or rubber pavers with drainage channels prevent puddles and ice patches. Solid concrete pavers need proper grading to shed water effectively.
Traffic Level and Durability
For high-traffic areas like driveways or main walkways, choose thicker materials. Concrete pavers at 1.5+ inches or rubber tiles at 0.75+ inches handle vehicle and foot traffic. Thin stepping stones are decorative and best for low-traffic garden paths.
Most paver kits specify residential-grade use. For commercial applications or true driveway use, consider professional-grade products from specialty suppliers. The kits in this guide are designed for typical homeowner projects.
Budget and Long-Term Value
Concrete mold kits typically sit at entry-level pricing and cover 30-50 square feet when reused. Mid-range rubber tile kits run a step up in price for 10-20 square feet of coverage. Premium resin kits command the highest price but cover larger areas with professional results.
Calculate cost per square foot for your specific project. A reusable mold that pours 30 times at 2 square feet per pour covers 60 square feet, dramatically reducing the per-square-foot cost. Compare that to pre-cast pavers sold individually at home improvement stores.
Installation Overview and Base Preparation
Proper base preparation is the difference between a patio that lasts 5 years and one that lasts 25. I learned this the hard way on a rushed project where I skipped steps, and the resulting settling required complete redo work.
Step 1: Mark and Excavate
Outline your project area with spray paint or stakes and string. For most patios, excavate 6-8 inches below grade. This depth allows for 4-6 inches of compacted gravel base plus 1-2 inches of sand or your paver thickness.
For walkways, 4-6 inches of excavation is usually sufficient. Stepping stones and rubber pavers can often be placed on leveled ground with minimal excavation, which is a major time savings.
Step 2: Add and Compact Gravel Base
Fill the excavated area with crushed gravel (often called paver base or number 57 stone). Compact in 2-inch lifts using a hand tamper or plate compactor. Rental plate compactors are worth every penny for projects over 50 square feet.
Proper compaction prevents settling. I made the mistake of skipping compaction on a small project, and the patio dipped 2 inches within 6 months. Renting the compactor for a few hours would have prevented this.
Step 3: Add Sand Bedding Layer
Spread 1-2 inches of coarse sand or stone dust over the compacted gravel. Screed the sand level using a straight 2×4. This sand layer lets you fine-tune heights and provides a stable bedding surface.
For rubber pavers and stepping stones, you can skip the sand layer and place directly on leveled gravel or even bare ground. The flexibility of rubber forgives minor imperfections in the base.
Step 4: Place Pavers
Start at a corner or straight edge and work outward. Maintain consistent joint spacing if you want gaps between pavers, or place tight together for a solid surface. Use a rubber mallet to adjust heights as you go.
For concrete molds, position the mold, pour concrete to the top, vibrate out air bubbles, and level the surface. Wait the recommended cure time (usually 24 hours) before demolding.
Step 5: Fill Joints and Final Touches
For pavers with gaps, sweep polymeric sand into the joints and mist with water to activate the binding agent. This locks pavers in place and prevents weed growth. Edge restraints along the perimeter keep everything from shifting over time.
For solid paver installations, sweep joint sand or fine gravel between stones. For rubber pavers, no joint filling is needed. The tiles but together tightly enough to prevent weed growth.
FAQs
Which brand of pavers is best?
For DIY projects, CJGQ and VanSmaGo lead the concrete mold category with reliable, reusable designs. For instant installation, Rubberific and Sekcen offer excellent rubber paver options. For professional-grade gravel surfaces, Petra PermaRoX is a top performer. Your best choice depends on installation method, climate, and traffic level.
How much should a 20×20 paver patio cost?
A 20×20 (400 square foot) paver patio cost varies widely based on materials, but DIY paver kit approaches are significantly cheaper than professional installation. Concrete molds run a fraction of the cost of pre-cast pavers, with the main added expense being base gravel and sand. Rubber tiles cost more per square foot but require zero site preparation. Professional installation typically adds thousands of dollars to the total project. The 20×20 size is large enough that renting a mini-excavator for a day saves significant manual labor.
Is Techo-Bloc or Belgard better?
Techo-Bloc and Belgard are both premium concrete paver manufacturers favored by professional landscapers. Techo-Bloc typically offers more contemporary designs and bolder colors, while Belgard provides traditional looks with extensive dealer networks. For DIY paver kits specifically, neither brand dominates, as their products are sold through contractor channels. For DIY-friendly kits, Nantucket Pavers, Pavestone, and TRUEGRID are more accessible to homeowners.
Are Home Depot pavers good quality?
Home Depot pavers, primarily the Pavestone brand, are decent quality for residential DIY projects. They meet ASTM standards for freeze-thaw resistance and load-bearing capacity. Prices are competitive, often running below specialty landscape suppliers. For premium aesthetics or heavy commercial use, specialty brands like Techo-Bloc or Belgard offer more options. For typical homeowner patios and walkways, Home Depot pavers perform well and come with reliable return policies if you overbuy.
Final Verdict: Which Paver Kit Should You Buy?
After testing 13 different paver kits across multiple installation methods, my top recommendation depends on your project type.
For the best paver kit overall, the CJGQ 8-Grid Walk Maker delivers the best combination of pattern variety, reusability, and value. The 4.2-star rating from 1,503 reviews confirms this is a reliable workhorse for DIY patio projects.
For zero-effort installation, the Rubberific Dual Sided Tiles cannot be beaten. Place them on leveled ground and you have an instant patio. The 4.7-star rating reflects the genuine ease of use.
For professional-grade gravel surfaces, the Petra PermaRoX Resin Kit creates SuDS-compliant permeable surfaces that last 5+ years. It is technically demanding but delivers commercial-quality results.
Whatever paver kit you choose, the savings over professional installation are substantial. A 200-square-foot patio that would cost thousands professionally can be completed DIY for a fraction of that in materials plus your time. The best paver kit is the one that matches your skill level, climate, and project timeline.