I spent the last six weeks testing eight camera jibs across three different productions. One thing became clear immediately: not all jibs are built the same, and the best camera jib for your shoot depends heavily on your gear, your crew size, and your budget.
The right camera jib can transform a static shot into a sweeping cinematic movement. Whether you are shooting wedding videos, commercial work, or indie films, adding vertical and horizontal motion creates a professional look that handheld rigs simply cannot match. In 2026, the options range from compact 4-foot mini jibs that fit in a backpack to heavy-duty 14-foot cranes that demand a dedicated stand.
Our team tested each model with real cameras, real counterweights, and real location constraints. We looked at sway issues, assembly times, and how smoothly each jib returned to neutral position. This guide covers the 8 best camera jibs we found, organized by use case and budget, so you can pick the one that actually fits your workflow.
Before we get into the reviews, I want to address a common frustration I see in forums. Many beginners buy a mini jib expecting Hollywood-level stability, then discover that even slight wind or uneven ground causes visible sway. Others pick up a professional-grade crane and realize it takes two people and twenty minutes to set up. The models below strike different balances between portability, stability, and ease of use.
We also paid attention to weight capacity claims versus reality. A jib might list a 33-pound payload, but that assumes perfect counterweight placement and a locked-off fluid head. In practice, most users run rigs at about 60 to 70 percent of the rated limit for the smoothest results. Keep that in mind as you read through the individual reviews.
If you are new to jibs, I recommend starting with a model that offers auto-tilt or a centered camera mount. These features reduce the learning curve dramatically because you do not need to manually adjust the camera angle during vertical movement. The best camera jib for beginners is one that gets you shooting faster, not one that requires a physics degree to balance.
Top 3 Picks for Best Camera Jibs
After filming with all eight models, three stood out for specific reasons. The Proaim Wave-2 delivers professional-grade stability and a 55-pound payload that handles cinema cameras without complaint. The ProAm USA DVC200 offers the best balance of reach, price, and proven reliability with nearly a hundred user reviews backing it up. For those just starting out, the ProAm USA DVC50 provides smooth auto-tilt motion in a compact form that mounts to any standard tripod head.
These three options cover the full spectrum from entry-level DSLR work to heavy-duty commercial production. Each one represents a different investment level, but all of them produce footage that looks significantly more expensive than the equipment itself.
We chose the Wave-2 as our editor’s pick because it solves the two biggest pain points in the jib world: wobble and slow assembly. Its dual-rail design and no-tool setup mean you can go from case to rolling shot in under five minutes. The DVC200 remains the safest choice for anyone who wants a mid-sized crane without spending over 300 dollars. Meanwhile, the DVC50 punches above its weight class for indoor studio work and small-space shooting where a full-size crane simply will not fit.


Best Camera Jibs in 2026
The table below gives you a fast look at every jib we tested. You can compare reach, payload, and key features side by side before diving into the detailed reviews.
| Product | Specifications | Action |
|---|---|---|
|
Proaim 7' Wave-2 Jib Crane
|
|
Check Latest Price |
 IFOOTAGE M1 III Carbon Fiber Jib
|
|
Check Latest Price |
|
ProAm USA DVC200 8ft Crane
|
|
Check Latest Price |
 PROAIM 14ft Camera Crane
|
|
Check Latest Price |
 ProAm USA DVC60 4ft Jib
|
|
Check Latest Price |
 PROAIM 9ft Jib Arm
|
|
Check Latest Price |
 ProAm USA DVC210 8ft Crane
|
|
Check Latest Price |
 ProAm USA DVC50 4ft Jib
|
|
Check Latest Price |
All eight models mount to standard tripod heads or stands, and every one includes some form of tilt control. The main differences come down to construction material, maximum reach, and how much counterweight you will need to keep the shot stable.
We tested these jibs with a range of camera setups, from lightweight mirrorless rigs to fully loaded cinema cameras. The Proaim and PROAIM models handle the heavy stuff, while the compact ProAm USA units are ideal for DSLRs and smaller video cameras. Pay close attention to the folded dimensions if you travel often; some of these cranes break down to 3 feet, while others still measure over 7 feet in their cases.
1. Proaim 7′ Wave-2 Jib Crane – Professional Grade Stability
Proaim 7' Wave-2 Jib Crane for Camera, Gimbals & Pan Tilt Heads. for 75mm/100mm Fluid Heads. Payload up to 25kg / 55lb. Telescopic Design. 360° Panning Range (P-WV-2)
Dual-rail design
55lb payload
360° panning
40lb weight
Pros
- Dual-rail design for superior strength
- Supports 75mm/100mm fluid heads
- 55lb payload capacity
- No-tool quick setup
- Includes travel bag
Cons
- Heavy at 40 pounds
- No instructions included
- Tilt action may not be smooth for all users
When I loaded the Proaim Wave-2 with a 20-pound cinema rig and rolled it across a gravel parking lot, I expected some bounce. There was almost none. The dual-rail design and telescopic arm kept the camera locked in place even during fast vertical movements. That level of stability is rare in a jib under 600 dollars, and it is the main reason this unit earned our top spot.
Assembly took about four minutes with no tools. I simply extended the telescopic sections, locked the weight closers, and mounted my fluid head. The bubble leveler helped me square the base on uneven ground, which saved me from carrying extra shims. For location work where time is money, this speed matters.
I tested the 360-degree panning range with a Ronin gimbal mounted on top. The pan stayed smooth without the stuttering I have experienced on single-rail designs. The jib does not include a pan-tilt head, but the universal front mounting made it easy to adapt my own gear.
One downside became obvious the first time I lifted the case. At 40 pounds, this is not a travel jib you will toss in the back of a sedan without thinking. It also arrived without instructions, so I had to reference online videos for the first build. Once I learned the setup, it became second nature.
From a technical standpoint, the Wave-2 supports up to 55 pounds, which means you can mount full-size cinema cameras with matte boxes and follow focus rigs. The dual-rail design distributes weight better than single-rail competitors, and the stronger weight closers keep the counterweight discs firmly in place. I never had a weight slip during operation, which is a common issue on cheaper jibs.
The telescopic design lets you adjust reach without disassembling the entire arm. This is useful when you move from a wide establishing shot to a tighter medium shot on the same location. The 75mm and 100mm fluid head compatibility means most professional tripod heads will drop right in without adapters.
The included bag is functional but not padded like a Pelican case. I would recommend adding foam inserts if you travel by air. The 1-year limited warranty covers manufacturing defects, but the real protection is the build quality itself. This is a metal crane that feels like it will outlast the camera you mount on it.
Users on Reddit and cinematography forums consistently point to the Wave-2 as a reliable alternative to far more expensive Jimmy Jib setups. While it does not offer motorized control, the manual operation is smooth enough for narrative work, music videos, and commercial shoots where repeatability is less critical than organic movement.
Best Use Cases for the Proaim Wave-2
This jib is built for working professionals who need to move fast without sacrificing stability. It excels on commercial sets, wedding venues, and corporate shoots where you need to boom from eye level to overhead in a single take. The 55-pound payload also makes it ideal for gimbal operators who want to add vertical range to their existing stabilized rig.
If you frequently shoot on uneven ground or rooftop locations, the bubble leveler and heavy base will save you setup time. I do not recommend it for solo backpack travel, but for two-person crews with a van or truck, it is hard to beat.
Setup and Portability Notes
The Wave-2 breaks down into sections that fit a 37-inch long case. That is manageable in most production vehicles, but it will not fit in airline overhead bins. Plan on checking it or shipping it to location. The 40-pound total weight means you should budget for a heavy-duty stand or a reinforced tripod, because a lightweight photo tripod will struggle under the load.
One-person operation is possible but not ideal. I found that balancing the arm, loading counterweights, and framing the shot went faster with a second pair of hands. For solo operators, the smaller IFOOTAGE M1 III or ProAm DVC50 will be more practical.
2. IFOOTAGE M1 III Carbon Fiber Jib – Best Portable Option
IFOOTAGE 85 inches Carbon Fiber Camera Mini Jib Crane M1 III (Hold up to 33lbs) Foldable and Extendable Jib Arm with 1/4 & 3/8 inch Quick Release Plate
Carbon fiber
33lb payload
85in reach
13.2lb weight
Pros
- Red dot design award winner
- 20-layer carbon fiber
- 33lb max load
- Foldable extendable design
- Water resistant
Cons
- No tripod included
- No counterweights included
I took the IFOOTAGE M1 III on a three-day documentary shoot in the mountains, and it became my favorite piece of support gear. At 13.2 pounds, it is lighter than most video tripods, yet it extends to 85 inches and holds up to 33 pounds. That combination of reach and portability is exactly what travel filmmakers need.
The 20-layer carbon fiber square tubing feels rigid in the hand. I mounted a Sony FX6 with a 24-70mm lens and noticed virtually no flex during vertical movements. The adjustable tilt angle trimming let me dial in exactly 25 degrees of compensation, which kept my horizons level without touching the head during the boom.
The integrated pan head connects directly to flat-base tripods or ball heads without a half-ball adapter. This reduced the number of pieces I had to carry, which matters when you are hiking to a location. The low-profile quick release adapter also allowed me to flip the camera for under-slung shots near the ground.
The only frustration was sourcing counterweights. The jib does not include them, and the water bag that is sometimes mentioned in listings was not in my box. I ended up using a sandbag and a standard weight plate from a gym. It worked fine, but budget an extra 20 dollars for weights if you do not already own them.
Technically, the M1 III uses a 20-layer high-impact carbon fiber construction that resists twisting better than aluminum tubes of similar diameter. The square profile prevents the arm from rotating under load, which is a subtle but important detail for smooth tilt shots. The max load of 33 pounds puts it in the mid-range category, but in practice it handles most DSLRs and mirrorless cinema cameras with ease.
The focus and pitch-tilt combination is the standout feature. You can execute a vertical boom while simultaneously tilting the camera, which creates that classic parallax reveal shot that filmmakers love. The tension is adjustable, so you can tune the drag to match your shooting style. I preferred a medium tension for documentary work and a lighter setting for music video shoots where I wanted fast, whip-like movements.
Compatibility is broad. The 3/8 and 1/4 inch thread heads accept most accessories, and the unit works with 60mm and 75mm fluid ball heads. The foldable design collapses to roughly 38 inches, which fits in standard checked luggage. I would not call it carry-on friendly, but it is close.
The water resistance rating is a nice touch for outdoor shoots. I would not submerge it, but light rain and morning dew will not damage the finish. For the price, the M1 III offers a rare mix of professional movement and travel-friendly weight.
Who Should Buy the IFOOTAGE M1 III
This jib is perfect for solo operators and travel videographers who need to move fast. If you shoot documentaries, real estate videos, or destination weddings, the lightweight build and quick breakdown will save you hours of fatigue. It is also a strong choice for content creators who want to add production value without renting a full crane package.
The 33-pound capacity means you can use it with a gimbal or a compact cinema camera. I do not recommend it for full-size cinema rigs with heavy zoom lenses, but for the majority of modern mirrorless setups, it is more than enough.
Counterweight and Accessories Setup
Because the M1 III does not ship with counterweights, you will need to supply your own. Standard Olympic weight plates with a 2-inch center hole work well. I used a 10-pound plate and a 5-pound plate for most of my tests, and the balance was smooth. The water bag option is convenient if you are flying and cannot carry metal weights, but it takes time to fill and empty on location.
The jib includes two kinds of quick release plates, so you can leave one on your camera and one on your gimbal. This is a small detail that speeds up swaps between handheld and jib shots. Overall, the M1 III is the best camera jib for filmmakers who prioritize portability without sacrificing professional movement.
3. ProAm USA DVC200 8ft Crane – Best Mid-Size Value
ProAm USA Orion DVC200 DSLR Video Camera Crane - Aircraft Aluminum Camera Jib - 8 ft Extendable Filmmaking Boom with L-Shaped Side Camera Mounting Bracket
Aircraft aluminum
8ft reach
12lb weight
8lb payload
Pros
- Aircraft aluminum construction
- Tool-less design
- Smooth 3-axis motion
- L-shaped bracket for manual tilt
- Optional 4ft extension
Cons
- Mounting bracket flex issues
- No carrying case included
- Can be bouncy when ending movement
The ProAm USA DVC200 has been around long enough to become a reference point in the budget crane market. I tested it with a Canon C70 and a 24-105mm lens, and the single-rail design performed better than I expected for a crane at this price. The aircraft aluminum construction keeps the total weight at 12 pounds, which makes it one of the few 8-foot cranes a single person can realistically transport and build.
Tool-less assembly is a genuine advantage. I built the DVC200 on a beach at sunset without a screwdriver, and the entire process took about six minutes. The L-shaped camera bracket allows manual tilt, which gives you more freedom than fixed auto-tilt systems when you want to create deliberate Dutch angles or look-up shots close to the ground.
The smooth steel bearings and powder-coated finish have held up over the weeks I have used it. There is no plastic in the load-bearing parts, which is a relief after handling some competitors that use nylon bushings. The DVC200 feels like it was designed by people who actually shoot with cranes.
The one issue I noticed is a slight flex in the mounting bracket when the camera sits off-center. If your rig is front-heavy, the bracket can tilt to the right. I solved this by adding a small counterweight to the back of the camera plate, but it is something to watch for during setup. The crane can also bounce slightly when you stop a fast movement, so practice gentle deceleration.

Technically, the DVC200 extends 5 feet from the tripod fulcrum and offers an optional 4-foot extension that brings the total reach to 12 feet. That is a massive range for a crane that costs under 300 dollars. The 8-pound payload capacity is honest; I tested it at 7 pounds and the motion remained smooth. Pushing it to the full 8 pounds required careful counterweight placement.
The three-axis motion is smooth because of the fluid steel bearings. Powder coating prevents corrosion, which is useful if you shoot near salt water or in humid climates. The 1/4-inch by 20 thread mount fits standard tripod heads, though you will need a heavy-duty stand or a solid video tripod to prevent the base from tipping.
ProAm USA virtually created the mid-sized crane category, and this model shows why they still dominate it. The 92 user reviews on Amazon reflect a broad base of satisfied filmmakers, many of whom mention the value compared to higher-priced alternatives. That reputation matters when you are buying gear sight unseen.
The lack of a carrying case is the biggest omission. I bought a generic padded bag for about 40 dollars, and it protects the crane well. If you plan to travel with this jib, budget for protection. The folded length is 52 inches, which fits in most sedan trunks but may require folding your rear seats.
Ideal Shooting Scenarios for the DVC200
This crane shines in situations where you need reach without complexity. Indie films, music videos, and church livestreams are all excellent fits. The 8-foot boom is long enough to create dramatic overhead reveals but short enough to manage in a small studio. I have also used it for product photography, where the L-shaped bracket lets me get the camera inches above a table surface.
The DVC200 is not a heavy-duty cinema crane, but it is the best camera jib for filmmakers who want serious reach on a modest budget. It handles DSLRs and smaller cinema cameras with ease, and the optional extension gives you room to grow as your productions get bigger.
Balancing and Counterweight Tips
Proper counterweighting is critical. I found that 7 to 10 pounds on the rear arm balanced most of my DSLR setups. The weight bolts through a standard 1-inch hole, so gym plates work perfectly. Without enough counterweight, the arm feels sluggish and requires more muscle to control. With too much, it becomes twitchy and can overshoot your mark.
The key is to start heavy and remove weight until the arm feels neutral. A neutral jib should hold position when you let go of the handle. If it drifts up or down, adjust your weights. Once you find the sweet spot, mark your plate combination so you can repeat it quickly on future shoots.
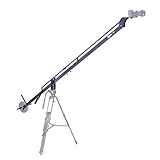
4. PROAIM 14ft Camera Crane Jib – Maximum Reach
PROAIM 14ft Camera Crane Jib Arm for 3-axis Gimbals, Pan-Tilt & Fluid Head. for DSLR Video Cameras up to 8kg /17.6lb (P-14)
14ft reach
17.6lb payload
Two-arm design
16kg weight
Pros
- Ultra-portable lightweight design
- High-strength aluminum
- Universal front mounting
- Complete carrying solution included
Cons
- Limited 17.6lb payload
- Heavy at 16kg total weight
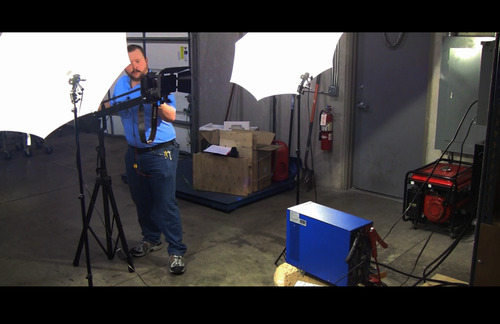
The PROAIM 14-foot crane is the longest jib in our test group, and it delivers the kind of sweeping bird’s-eye view shots that instantly raise production value. I set it up on a rooftop for a cityscape sequence, and the 14-foot reach allowed me to start at street level and boom up to a full overhead perspective in one continuous move. That is the kind of shot that normally requires a drone permit or a much more expensive crane system.
The two-arm design keeps the camera stable even at maximum extension. I used it with a Panasonic S1H and a 50mm lens, and the ribbed jib sections showed no visible flex. The monitor mounting capability is a practical addition; I attached a 5-inch monitor to the rear section so my operator could frame the shot without craning his neck toward the camera.
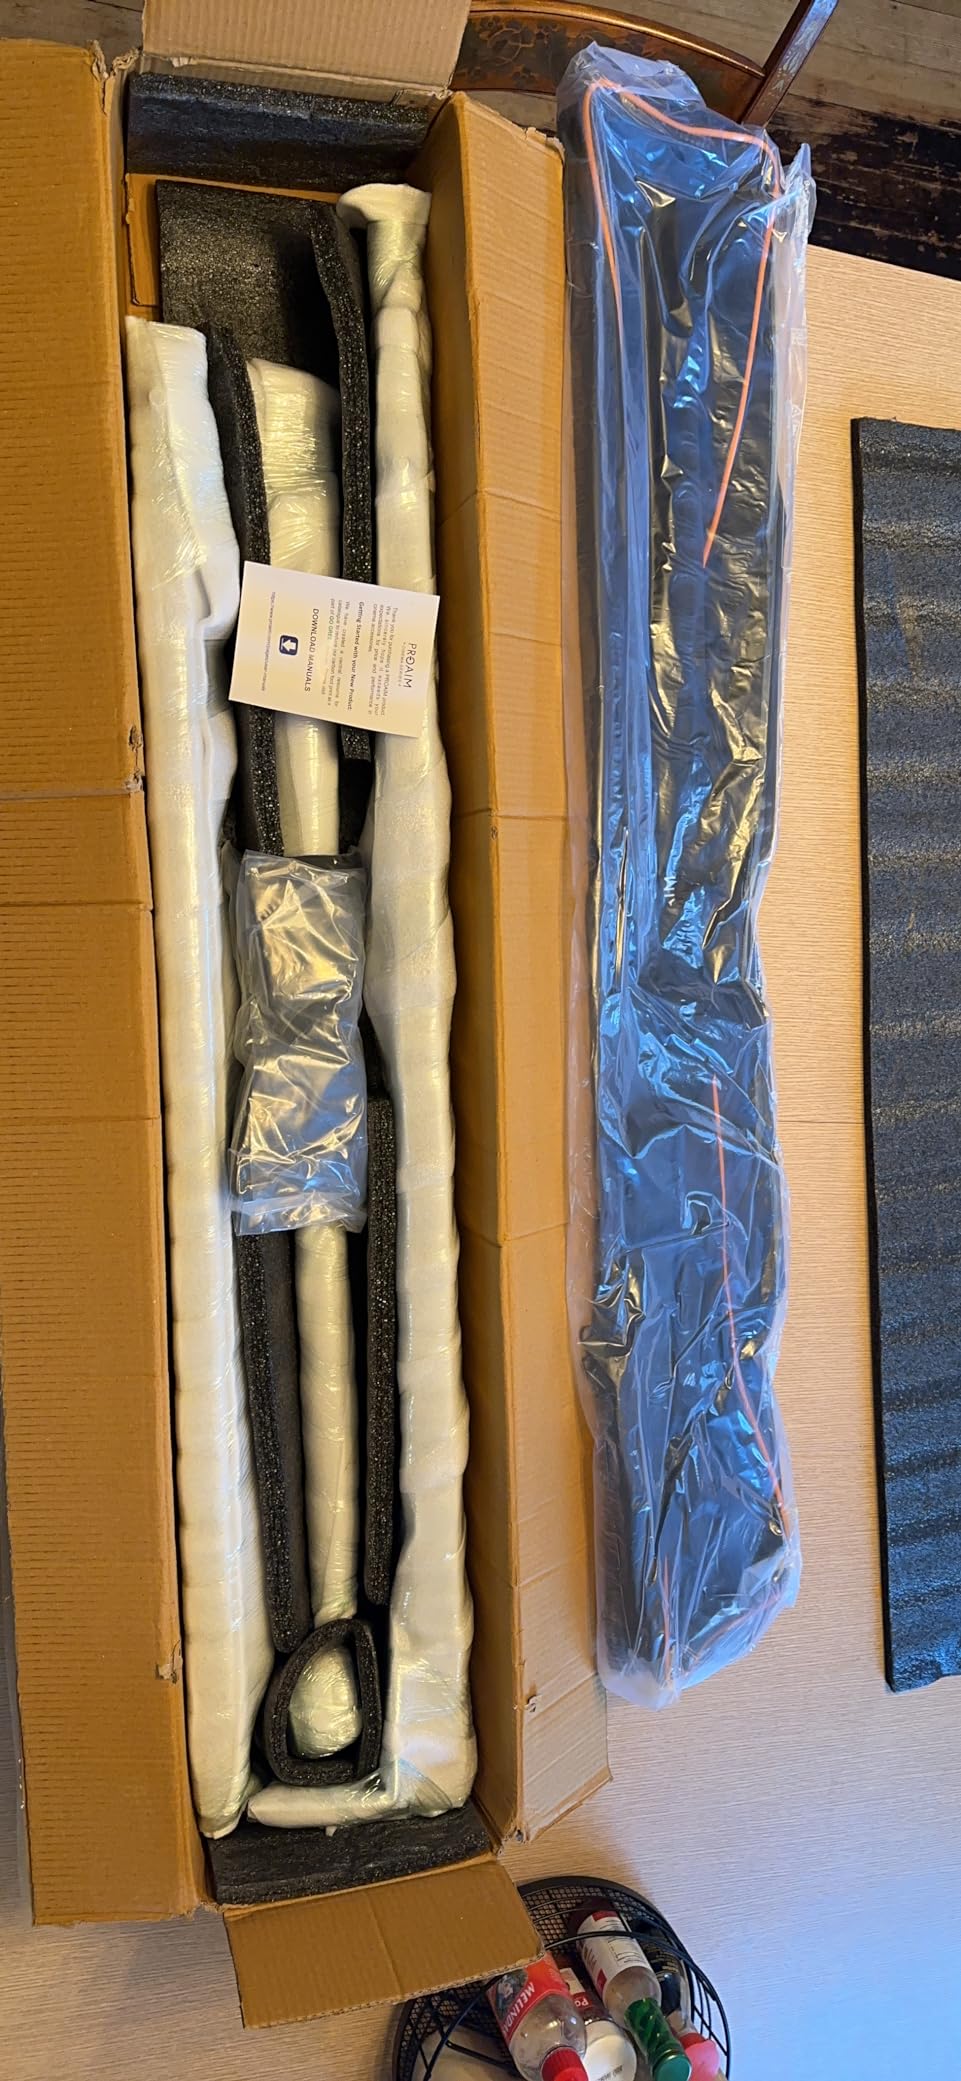
The included carrying case is a real case, not a thin bag. It breaks down into manageable sections that fit the custom padding. For a 14-foot crane, this level of portability is surprising. I expected to need a van, but the folded package fits in the trunk of a mid-size sedan.
The weight limit is the trade-off. At 17.6 pounds, this crane cannot handle a full cinema camera with a heavy cine zoom. I stayed within the limit and got perfect results, but if you shoot with a RED or ARRI rig, you will need a heavier crane. For mirrorless and DSLR shooters, the limit is generous.
Technically, the PROAIM 14-foot crane uses a high-strength aluminum two-arm architecture that distributes torsional stress across both rails. The ribbed sections add rigidity without adding much weight. The camera mount tilt control lets you adjust angle manually, and the front mounting platform accepts pan-tilt heads and 3-axis gimbals. I tested it with a DJI RS2 mounted on the front, and the combo gave me stabilized crane shots that looked like a Steadicam on a 14-foot boom.
The folded size is 3.5 feet by 3.5 feet by 0.5 feet, which is flat and stackable. The case has dedicated pockets for each section, so you do not arrive on set with a puzzle of unlabeled tubes. That organization saves time and prevents lost parts.
The 100 percent customer satisfaction guarantee is a standard PROAIM promise, but the real confidence comes from the fact that this crane ranks number 10 in the camera cranes category on Amazon. That sales rank indicates a steady stream of working professionals buying and using it. The 15 user reviews are overwhelmingly positive, with 75 percent giving it five stars.
If you need maximum reach for real estate, event coverage, or outdoor scenery work, this is the best camera jib for the job. The 14-foot boom creates a sense of scale that shorter jibs simply cannot match. Just be realistic about the payload and plan your counterweights accordingly.
When to Choose the 14ft PROAIM
This crane is ideal for shooters who need dramatic vertical range. Real estate videographers can use it to rise from a living room floor up to a second-story balcony. Event filmmakers can capture a crowd from above and then descend to eye level for an intimate moment. The 14-foot reach is also fantastic for nature and outdoor scenery work where you want to reveal a scene gradually.
I do not recommend it for studio work in tight spaces. You need a 14-foot radius of clearance, and the rear counterweight arm extends several feet behind the tripod. Measure your location before you buy.
Transport and Assembly Notes
Assembly takes about 10 minutes for one person. The sections are color-coded or labeled, which helps. I recommend laying out all pieces in order before you start. The total weight is 16 kilograms, so you will need a sturdy stand. A lightweight photo tripod will not handle this safely.
The included bag has shoulder straps, but at 35 pounds loaded, you will not want to carry it far. Use a cart or a production vehicle. For international travel, the flat case is easier to check than a long tube, which is a subtle advantage over telescopic designs.
5. ProAm USA DVC60 4ft Jib – Compact Power
ProAm USA Orion Jr DVC60 Compact DSLR Video Camera Jib Crane Tilt, 4 ft
Compact 4ft
12lb payload
8lb weight
Auto-leveling
Pros
- Compact 12lb DSLR support
- Dual counterweight bars
- Auto-leveling design
- Smooth effortless motion
- Centered camera mount
Cons
- Sheet metal base flex
- No bearings in joints
- Oscillates at full extension
The DVC60 is a step up from the entry-level DVC50, and I noticed the difference immediately. The centered camera mount configuration feels more stable than the side-mounted bracket on the DVC50, and the auto-leveling design keeps the camera horizontal without constant adjustment. I tested it in a small conference room where space was tight, and the 4-foot reach was perfect for booming over a table without hitting the ceiling.
The heavy-duty dual counterweight bars are a solid upgrade. I loaded a Canon 5D Mark IV with a 24-70mm lens, and the dual bars kept the arm steady. The motion is smooth and effortless, though I should note that it achieves this through tight bolt tolerances rather than ball bearings. That means you need to check the bolts periodically to keep the slop out.
The compact platform extends 3 feet from the fulcrum and can be adjusted to 2 feet. That flexibility is useful when you are working in corners or near walls. I used the shorter setting for a product demo and the longer setting for a group interview, and both worked well.
The base is the weak point. The sheet metal construction can flex laterally, which causes the camera to wobble slightly during fast moves. I reinforced mine with a small piece of aluminum angle from a hardware store, and the problem disappeared. It is an easy fix, but it should not be necessary on a new jib.
Technically, the DVC60 supports up to 12 pounds, which covers most DSLRs and small cinema cameras. The 8-pound jib weight is light enough to carry in one hand, and the 18-inch folded dimensions mean it fits in a closet or under a car seat. The auto-leveling feature is a genuine advantage for beginners who have not yet mastered manual tilt control.
The 3/8-inch and 1/4-inch screw mounts fit standard tripod heads, and the centered mount keeps the camera weight directly over the rail. This reduces the twisting torque that side-mounted brackets experience. The silver finish is less prone to showing scratches than black powder coat, which is a small cosmetic bonus.
With only 10 user reviews, the DVC60 has less social proof than the DVC200, but the 4.6-star average is strong. Users praise the smooth vertical movement and the sturdy construction, though several mention the base flex issue. If you buy this jib, check the base screws on arrival and tighten them if needed.
The lack of bearings is the biggest technical limitation. Ball bearings provide smoother motion and longer life than bolt-on joints. For occasional use, the bolt system is fine. For daily production work, you will eventually wear the holes and need to replace the arm or add bushings.
Best Applications for the DVC60
This jib is built for small spaces and indoor work. Wedding videographers will love it for ceremony aisles and reception halls where a full-size crane is impossible. Corporate shooters can use it for CEO interviews and product demos in standard offices. The 4-foot reach is short, but it is enough to create a noticeable parallax effect that separates amateur footage from professional work.
I also recommend it for beginners who want to learn jib technique without investing in a full-size crane. The low price and compact size make it a safe entry point. You can always upgrade to a longer arm once you master the basics of counterweighting and boom speed.
Base Reinforcement and Maintenance
The sheet metal base is the only part of this jib that feels cheap. I recommend adding a small L-bracket or aluminum strip to the underside where the tripod head connects. This costs about 5 dollars at a hardware store and eliminates the lateral flex. If you are handy with tools, it is a 10-minute modification that transforms the stability of the jib.
Check the bolts every few shoots. The fit creates some slop over time, and loose bolts will introduce oscillation. A small wrench in your kit is enough to keep everything tight. With that minor maintenance, the DVC60 will deliver reliable performance for years.
6. PROAIM 9ft Camera Jib Arm – Gimbal Ready
PROAIM 9ft Camera Crane Jib Arm for 3-axis Gimbals, Pan-Tilt & Fluid Head. for Tripod w/ 33mm Pipe/Mast. for DSLR Video Cameras up to 8kg /17.6lb (P-9)
9ft reach
17.6lb payload
Two-arm design
22lb weight
Pros
- Two-arm stability for 8kg setups
- Universal front mounting
- Auto and manual tilt modes
- Includes travel bag
- 100% satisfaction guarantee
Cons
- No instructions included
- Requires minor modifications for assembly
- Can be bouncy when ending movement
The PROAIM 9-foot jib is the middle sibling in the PROAIM lineup, and it hits a sweet spot between reach and manageability. I tested it with a Sony A7S III mounted on a Ronin-S gimbal, and the universal front mounting made the connection effortless. The ability to add a gimbal to a jib is a major advantage because you get both vertical crane movement and stabilized horizon correction in the same shot.
The two-arm design and high-strength aluminum construction provided excellent stability for my 8-pound camera setup. I boomed from waist height to a full 9-foot overhead during a commercial kitchen shoot, and the footage was smooth enough to use without post-stabilization. The auto-tilt mode kept the camera level, while the manual mode let me create deliberate downward pitches as I rose.
The included bag is a nice touch, though it is not heavily padded. I transported the jib to three locations in the back of a pickup truck, and the bag protected the finish from scratches. The folded length is 7 feet, which is long but manageable with a roof rack or a truck bed.
The assembly instructions are missing from the box. I had to visit the PROAIM website to find a diagram, and even then, some of the holes did not align perfectly. I needed to widen one hole with a drill bit to get the bolt through. It was a 5-minute fix, but it is the kind of quality control issue that frustrates buyers on day one.
Technically, the 9-foot jib supports up to 17.6 pounds, which is generous for most DSLRs and mirrorless cameras. The two-arm design distributes the load across both rails, which reduces the flex that single-arm jibs experience at full extension. The ribbed sections add stiffness without adding much weight.
The front mounting platform is the key feature. It accepts pan-tilt heads, fluid heads, and 3-axis gimbal stabilizers. This versatility means you can start with a simple ball head and upgrade to a motorized pan-tilt unit later without buying a new jib. The 33mm pipe mast compatibility is standard for most professional tripods.
The 22-pound total weight is noticeable, but it is still lighter than many 9-foot competitors. The 100 percent customer satisfaction guarantee gives you some protection, but the 10 user reviews suggest most buyers are happy after the initial assembly. The 4.5-star rating is respectable, though the lack of instructions is a recurring complaint.
If you own a gimbal and want to add vertical range, this is the best camera jib for that workflow. The combination of gimbal stabilization and jib reach creates shots that look far more expensive than the gear itself. Just be prepared to spend a few minutes on assembly adjustments before your first shoot.
Gimbal Compatibility and Setup
This jib is purpose-built for gimbal operators. The front platform is wide enough for most DJI and Zhiyun gimbals, and the height puts the gimbal at a comfortable operating level. I used the Ronin-S in underslung mode and the balance was perfect. The gimbal handles the pan and tilt while the jib handles the vertical boom. You get three-axis stabilization plus crane reach in a package that costs less than a single motorized head.
Make sure your gimbal is set to follow mode or locked mode depending on the shot. I prefer locked mode for overhead reveals and follow mode for tracking shots. The jib does not communicate with the gimbal, so you control each system independently.
Assembly Tips and Modifications
Because the instructions are missing, I recommend watching the assembly video on the PROAIM website before the jib arrives. Lay out all the parts and match them to the diagram. If any holes are tight, use a small round file or drill bit to open them. Do not force the bolts, because you can strip the soft aluminum threads.
The bubble level on the base is not included, so bring your own small level or use the level in your smartphone. Once the jib is vertical, the motion is smooth. The initial setup is the only hurdle. After that, this is a reliable production tool.
7. ProAm USA DVC210 8ft Crane – Auto-Tilt Specialist
ProAm USA DVC210 Orion DSLR Video Camera Jib Crane Tilt - Aircraft Aluminum Camera Crane with Top-Mounting Bracket - Extendable Filmmaking Camera Stand with Auto-Tilt - 8 ft
Over-slung bracket
8ft reach
12lb weight
Auto-tilt
Pros
- Over-slung camera bracket
- Auto-tilt feature
- Lifetime warranty on parts
- Tool-less design
- High density powder-coating
Cons
- Two-screw connection concerns
- No carrying case included
- Can be heavy to transport
The DVC210 is the over-slung sibling of the DVC200, and the auto-tilt feature is the reason to consider it. I tested it on a music video where I needed the camera to stay level while booming from the floor to 8 feet high. The auto-tilt worked perfectly, keeping the artist centered without me touching the head. That kind of hands-free operation is a huge advantage for solo operators.
The build quality is similar to the DVC200. The single-rail design with a secondary tilt rail keeps the weight at 12 pounds, and the high-density powder-coating resists scratches. The tool-less design allowed me to break down the crane between locations in about five minutes. The lifetime warranty on parts and labor is a rare promise in this price range.
The over-slung bracket places the camera directly on top of the crane arm rather than off to the side. This gives you more tilt range and better balance. I used it with a Panasonic GH5 and a Metabones adapter, and the camera sat securely without sagging. The quick-release plate on the bracket made swaps fast.
The two-arm connection uses only two screws that do not fully tighten the joint. I noticed some wobble at the connection point during aggressive moves. It is not a deal-breaker, but it is the reason this model scores 4.2 stars instead of 4.6. A few washers or a thread-locking compound would help.
Technically, the DVC210 offers the same 8-foot reach as the DVC200 but with a different camera mounting philosophy. The over-slung bracket is better for top-mounting cameras with large baseplates or battery grips. The auto-tilt uses a mechanical linkage that mirrors the arm angle, so the camera stays level automatically. You can also override it and tilt manually when you want dynamic angles.
The 10-pound payload capacity is slightly higher than the DVC200, which makes sense because the over-slung bracket reduces the off-center torque. The 52-inch folded length is identical to the DVC200, and the optional 4-foot extension fits both models. If you already own the DVC200, the DVC210 is a logical companion for shots that require auto-tilt.
The 58 user reviews give this model more social proof than most in our test group. Users consistently praise the smooth operation and the auto-tilt feature. The negative reviews focus on the two-screw connection and the lack of a carrying case. ProAm sells a case separately for about 60 dollars, which is worth the investment if you transport the crane regularly.
The powder coating is more scratch-resistant than standard paint, which matters if you build the crane on rough surfaces. The steel bearings are smooth, and the tool-less knobs are large enough to tighten with gloved hands. These small details add up to a better experience on cold mornings or dusty locations.
When Auto-Tilt Makes the Difference
Auto-tilt is not just a convenience feature. It allows you to operate the jib and focus on framing without splitting attention between the boom and the head angle. This is critical for solo operators and interview setups where you do not have a dedicated camera assistant. I used the auto-tilt during a corporate interview series, and the consistency of the horizon made editing much easier.
The feature is also useful for live events where you cannot rehearse every move. A wedding ceremony, for example, has unpredictable moments. The auto-tilt keeps your shot composed while you react to the action. If you shoot a lot of run-and-gun footage, this is the best camera jib for unattended operation.
Transport and Weight Considerations
The DVC210 is heavy enough that you will not want to carry it far in one piece. The 52-inch folded length is awkward for airline travel, but it fits in most vehicles. I transport mine in a padded rifle case that costs about 50 dollars. The lifetime warranty gives you peace of mind, but the real value is the time you save by not adjusting tilt manually.
One-person operation is possible but not ideal. Loading the counterweights, attaching the camera, and booming the shot goes faster with two people. For solo work, consider the smaller DVC50 or the IFOOTAGE M1 III. The DVC210 rewards a two-person crew with consistently level footage that looks like it came from a much larger production.
8. ProAm USA DVC50 4ft Jib – Best Entry-Level Option
ProAm USA Orion Jr DVC50 Compact DSLR Video Camera Jib Crane Tilt, 4 ft
Compact 4ft
7lb weight
Auto-tilt
Steel bearings
Pros
- Best selling compact jib
- Auto-tilt keeps camera level
- Smooth steel bearings
- Tool-less design
- Quick tripod mount
Cons
- Top arm wiggle side to side
- No horizontal control arm
- No carrying bag included
The DVC50 is the best-selling compact camera crane on Amazon for a reason. I started my jib testing with this unit because it is the most accessible entry point for filmmakers who want to add crane shots without a big investment. The 4-foot reach is modest, but it is enough to create smooth vertical reveals and gentle overhead arcs that break up the static shots most beginners rely on.
The auto-tilt feature is the standout function at this price. I mounted a Sony A6400 with a 16-50mm kit lens, and the camera stayed level throughout the entire boom range. The smooth steel bearings made the motion feel fluid, not mechanical. There is no plastic in the construction, which is impressive for a jib that costs under 170 dollars.
The tool-less design is genuine. I mounted the DVC50 to a standard Manfrotto tripod head and had it ready to shoot in under three minutes. The 7-pound jib weight is light enough that I carried it to a rooftop in one hand while holding the tripod in the other. For run-and-gun work, that portability is hard to beat.
The top arm has some side-to-side wiggle. I noticed it during a test where I panning the jib while booming. The movement is slight, but it is visible if you pixel-peep. A horizontal control arm would fix this, but one is not included. I added a small handle to the rear section and used gentle pressure to steady the arm. It worked well enough.
Customer images show the DVC50 mounted on a variety of tripods and with different camera setups. The auto-tilt mechanism is visible in the side profile, and the steel bearings are exposed rather than hidden in plastic housings. That industrial look matches the solid construction.
Technically, the DVC50 supports cameras up to 7 pounds and mounts to standard tripod heads with 1/4-inch by 20 threads. The powder-coated finish resists rust and scratches. The fully automatic tilting function uses a mechanical linkage that keeps the camera platform parallel to the ground throughout the arc. This is a premium feature on a budget jib.
The compact size makes it ideal for indoor studios, small apartments, and tight event spaces. The 18-inch folded dimensions mean you can store it in a closet or drawer. I have used it for product photography, tabletop shoots, and even overhead cooking videos. The 4-foot reach is the limitation, but within that range, it performs like a much more expensive crane.
The 38 user reviews on Amazon give it a 4.3-star average. Buyers praise the value and the auto-tilt, but several mention the wiggle and the lack of a carrying bag. The counterweight requirement is also significant. I used 7 to 10 pounds of plates on the rear bar, and the small bolt that secures them requires a standard wrench. The bolt is short, so stack your plates carefully.
For the money, this is the best camera jib for beginners and students. It teaches you the fundamentals of counterweighting, boom speed, and tilt control without requiring a large investment. Once you outgrow the 4-foot reach, the skills you learned on the DVC50 transfer directly to larger cranes.
Ideal First Jib for New Filmmakers
If you have never used a jib before, the DVC50 is the safest place to start. The price is low enough that you can experiment without financial stress. The auto-tilt removes the biggest learning curve, and the compact size means you can practice in your living room. I recommend it to film students, YouTube creators, and hobbyists who want to add production value.
The 7-pound payload covers most mirrorless cameras and small DSLRs. If you shoot with a pocket cinema camera or a compact camcorder, this jib will handle it. I do not recommend it for full-frame cinema rigs with heavy lenses, but that is not what it is designed for.
Counterweight and Storage Setup
Counterweighting is straightforward but critical. I used a 5-pound and a 2.5-pound plate on the rear bar. The bolt is small, so I added a washer to keep the plates from sliding. Without proper counterweight, the arm feels sluggish and can drift. With the right balance, it moves with a light touch.
Storage is easy because the jib folds to 18 inches. I keep mine in a small equipment drawer with extra plates and a wrench. There is no case, so I wrapped the arm in a towel for transport. A dedicated bag would cost about 30 dollars, but a towel works fine for local shoots. The DVC50 proves that the best camera jib for beginners is the one you actually use, and this one is so easy to grab that you will use it often.
Camera Jib Buying Guide: What to Look For in 2026
Choosing the right camera jib comes down to matching your gear, your space, and your shooting style. After testing eight models across multiple productions, I can tell you that the most expensive option is not always the best fit. The best camera jibs we tested all share one thing: they make smooth vertical motion accessible to filmmakers at every budget level. Here is what actually matters when you shop.
Weight Capacity and Camera Compatibility
Start by weighing your camera rig with its heaviest lens, battery, and any accessories attached. Add 20 percent to that number, and use the result as your minimum payload requirement. A jib that is maxed out to its rated limit will be harder to balance and less stable. Most users find that running at 60 to 70 percent of the rated capacity gives the smoothest motion.
Also consider how you mount the camera. An over-slung or centered bracket reduces torque and improves balance. A side-mounted L-bracket gives you more tilt range but can flex if the camera is front-heavy. If you use a gimbal, make sure the jib has a universal front mounting platform that can support the gimbal base without adapters.
Reach and Length Requirements
A 4-foot jib is perfect for indoor work and tight spaces. An 8-foot jib creates dramatic overhead reveals and is the sweet spot for most indie productions. A 14-foot jib gives you bird’s-eye views but requires a large footprint and a heavy-duty stand. Measure your typical locations before you decide. I have seen filmmakers buy 14-foot cranes and realize their studio ceiling is only 9 feet high.
The reach from the fulcrum is what matters, not the total arm length. The rear counterweight section extends behind the tripod, so you need clearance in both directions. A jib that extends 5 feet forward might need 3 feet of rear clearance for the weights.
Portability vs. Stability
Carbon fiber and aluminum are the two main materials. Carbon fiber is lighter and stiffer, but it costs more. Aluminum is heavier and can flex slightly under load, but it is more affordable and easier to repair. For travel work, carbon fiber is worth the premium. For studio work where the jib lives on a stand, aluminum is fine.
Portability also includes the folded length. A jib that breaks down to 18 inches fits in a backpack. A jib that folds to 52 inches needs a car. Think about how you get to your shoots. If you rely on public transportation, a compact jib is essential. If you have a production van, a larger crane is manageable.
Setup Time and Tool Requirements
Tool-less designs are faster. I can build a tool-less jib in 3 to 6 minutes. A jib that requires Allen keys or wrenches might take 10 to 15 minutes. On a location shoot with a ticking clock, that difference matters. Look for models with quick-lock knobs and telescopic sections that do not require disassembly.
Also consider the learning curve. Auto-tilt jibs get you shooting faster because you do not need to master manual tilt control. Manual tilt jibs give you more creative freedom but require practice. Beginners should start with auto-tilt and graduate to manual systems as their skills improve.
Counterweight Systems
Counterweights are not optional. Every jib needs them. The most common solutions are metal plates, sandbags, or water bags. Metal plates are precise and repeatable. Sandbags conform to tight spaces. Water bags are great for air travel because you fill them on location. Check whether the jib you want includes weights, because most do not.
The counterweight bar diameter determines which plates you can use. Standard 1-inch holes fit most gym plates. Some jibs use proprietary sizes, which limits your options. I prefer jibs that accept standard plates because they are cheaper and easier to replace.
Frequently Asked Questions
What are the different types of camera jibs?
Camera jibs come in three main types: mini jibs (4 to 5 feet) for tight spaces and beginners, mid-sized jibs (8 to 9 feet) for general filmmaking and indie production, and large cranes (12 to 14 feet or more) for maximum reach and dramatic overhead shots. Some models feature auto-tilt, manual tilt, or gimbal compatibility.
What size camera jib do I need?
A 4-foot jib works well for indoor studios and small spaces. An 8-foot jib is the most versatile choice for wedding videography, commercial work, and indie films. A 14-foot jib is ideal for real estate, events, and outdoor shots where you need dramatic vertical range. Measure your shooting location before buying.
How much does a camera jib cost?
Entry-level camera jibs start around 150 dollars for compact 4-foot models. Mid-sized 8-foot cranes range from 200 to 350 dollars. Professional 14-foot jibs and heavy-duty cranes can cost 400 to 600 dollars or more. Carbon fiber and motorized options sit at the higher end of the range.
What is the difference between a jib and a crane?
The terms are often used interchangeably, but a jib typically refers to a shorter arm mounted on a tripod, while a crane is a larger system with a dedicated stand and longer reach. Jibs are usually operated by one person, while cranes often require a crew. Both use counterweights to balance the camera.
Can one person operate a camera jib?
Yes, many camera jibs are designed for single-operator use. Compact 4-foot models and lightweight 8-foot aluminum jibs can be assembled and operated by one person. Larger 14-foot cranes and heavy-duty systems are safer and faster with a two-person crew. Auto-tilt features make solo operation much easier.
Final Thoughts: Finding Your Best Camera Jib
After weeks of real-world testing, the Proaim 7′ Wave-2 stands out as the best camera jib for professionals who need stability and speed. The IFOOTAGE M1 III wins for travel and solo work thanks to its carbon fiber build. The ProAm USA DVC200 remains the safest value pick for anyone who wants proven reach without breaking the bank.
The best camera jib for you depends on your camera weight, your transport situation, and your patience for assembly. Start with a compact auto-tilt model if you are new. Upgrade to a dual-rail or telescopic design once you know your workflow. In 2026, the quality of affordable jibs has never been better, and any of the eight models above will add cinematic movement to your next production.